Lammily Doll
How to Give Your Lammily Doll Rainbow Colored Hair
Jan
By Dawn A. Bond
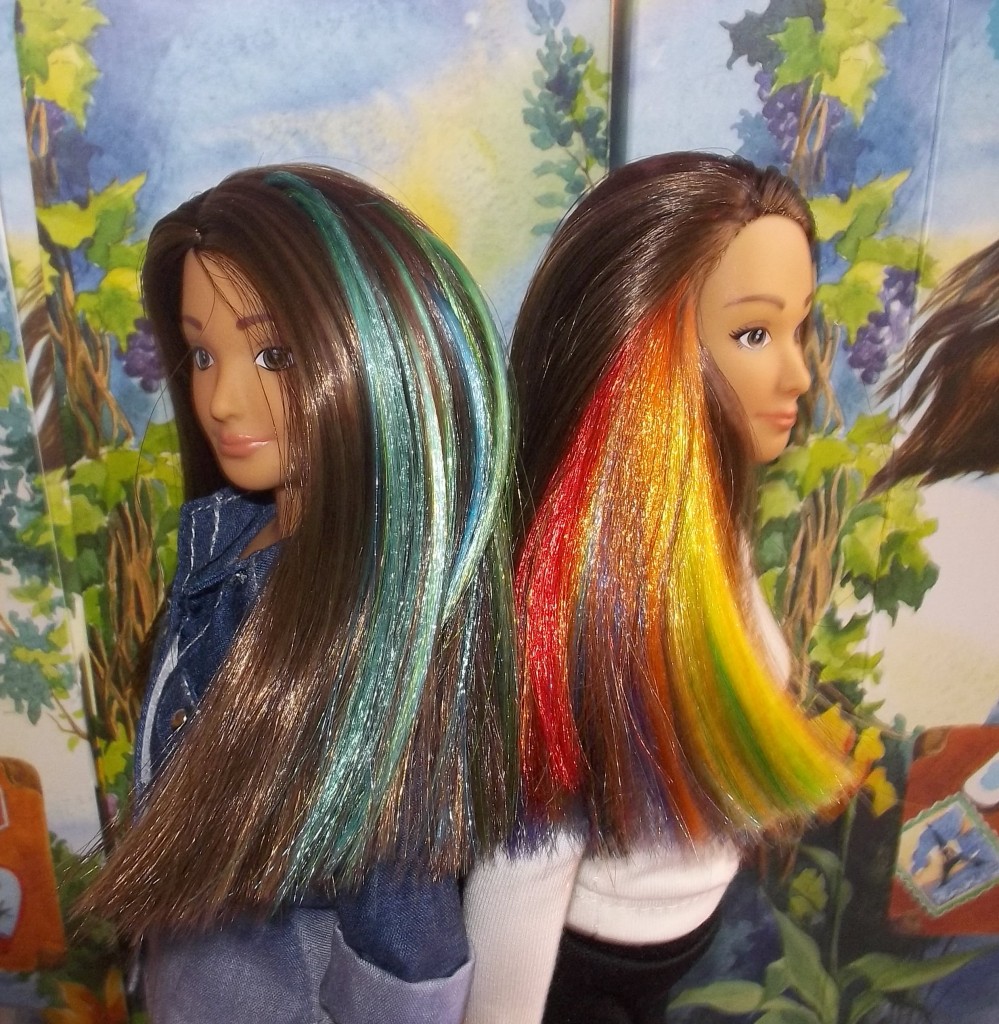
When I first read about the Lammily doll, I was hit with a sense of how diverse she could be. She made me smile with possibilities and ideas. Lammily, the average girl, she should be everything and do anything every girl does. What do girls enjoy doing? Fashion! With so many choices in our clothing and hair styles it is a natural for Lammily to dabble in those choices too. I can recall giving my own fashion dolls haircuts, well, okay they were not always mine. I also wanting the hair to be more changeable like my own. I have memories of my first review as a new teacher, during which the principle kept giving me odd looks before he finally asked “Is that snow or glitter in your hair?” Well glitter, of course! It was winter, it was 1983 and there was an afterschool party, so glitter it was! Substituting at a local high school a few years ago, I met a young man with gorgeous turquoise hair, it was such a wonderful blend of blues, aqua, teals and turquoise I spent some time discussing it with him. Thank you for the inspiration! Lammily should have the opportunity to have hair that is that fun and noticeable, hair that is just an extension of her personality. So here is how I gave my Lammily, Mily, a rainbow streak on her right side and how I am giving a new Lammily, seen in the photos, a splash of Turquoise bended color in her hair.

First, read about re-rooting a doll head. There are many videos, tutorials and even web-sites that offer great tutorials on how to re-root doll hair. Yes, you have to remove hair to add colored hair. Yes, you need a special tool to do this and yes, you need a colored hair supply as well as a wee bit of bravery and confidence. The doll will not feel a thing, and after your first snip of hair, and first inserted hair plug, your “I can” spirit will kick in and in no time “Ta Da” will be heard and it will be gorgeous.
You can buy doll hair in many types, in many forms and from any places. I have used nylon doll hair. (supplier listed at end of article). I used a forked needle mounted on a wooden handle as the insertion tool. There are many types of tools available, and you can even do this by removing the head (I don’t recommend removing Lammily’s head) and using a long doll needle and thread to attach the hair. The hair I used was 38” in length, I cut that in half (19”) then in half again (9 1/2”) so that the final insertion length was about apx. 4 ½”. The hair plug needs to be small…much smaller than you might first imagine. Use a thickness of less than 1/8” for each plug. You do not want to damage or break the tool or split the doll head by using a plug of hair too large.
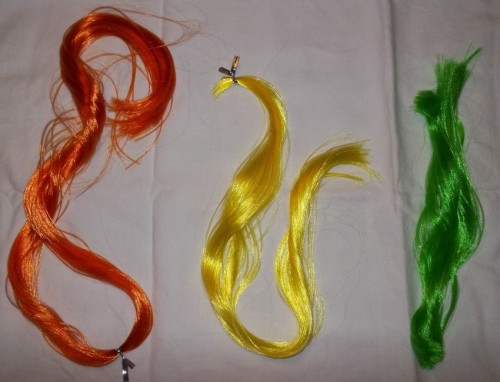
38”—19”—9 1/2” hair lengths

tools used
hair colors used
What color(s) do you want to add to Lammily? When I did the rainbow, I used 2 plugs of each color I used. The area I worked on went from mid-temple to well behind the ear, almost to her nape. For the turquoise, I am using solid color plugs and mixed color plugs. This is your color splash, so own it, make the color statement you want! You should plan to have 2 to 3 hair plugs of each color you plan to add, and when cutting out hair, cut only that number out. This Lammily had 9 hair plugs inserted. I do have many packets of colored hair that are designed to make only 2 or 3 hair plugs of each color in my Etsy shop, so you don’t have to purchase entire hair hanks, unless you want to, (the shop address is at the end of the article.)
Choose where you want to insert color on the head. Now separate the hair on Lammily’s head. We are not going to touch the dense hairline so secure that hair out of the way, using hair elastics or some other method. Now section off the area you want to focus on, and collect the rest of Lammily’s hair and secure that out of the way also. It might look like the photo.
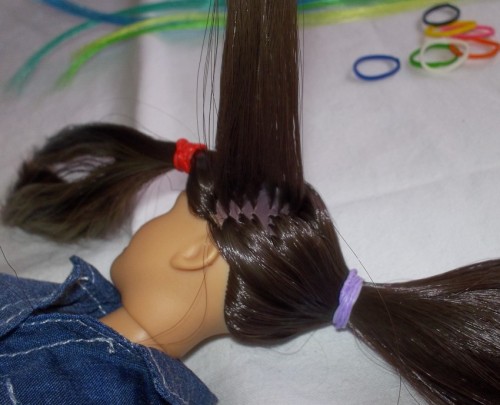
Hair sectioned and secured
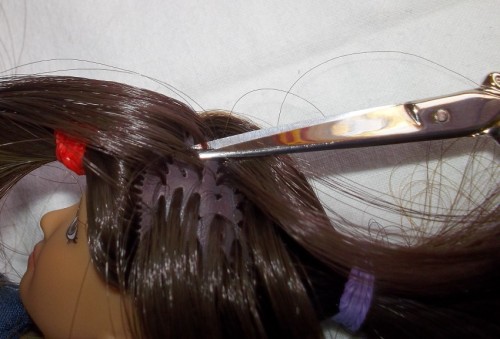
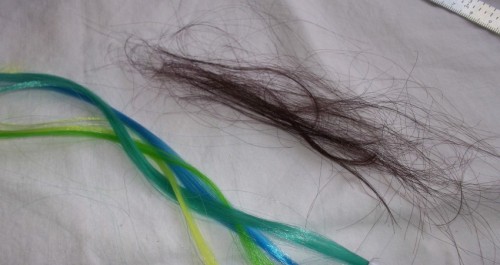
Clip out hair plugs carefully
Max size of hair to add
Nylon doll hair, tends to fly away and it also will attach itself to your clothing, skin, anywhere really. Have a covered work area, with plenty of light. Lay out your hair sections, tool, scissors and take a calming breath. You have to remove some of the hair in this area, to add hair in, I chose to do every other hair plug. Use sharp, small pointed scissors to cut those plugs close to the head, (see photo). Don’t panic, after the first snip, it is easier and this step is necessary. If you were to just add more hair between the existing plugs, you run the risk of splitting the doll head, and then hair would just fall out. Lammily may look good bald, I am not sure, and I don’t want you to be the first one to find out. So thin the hair first. Now lay out your hair sections, tool, scissors and take a calming breath.
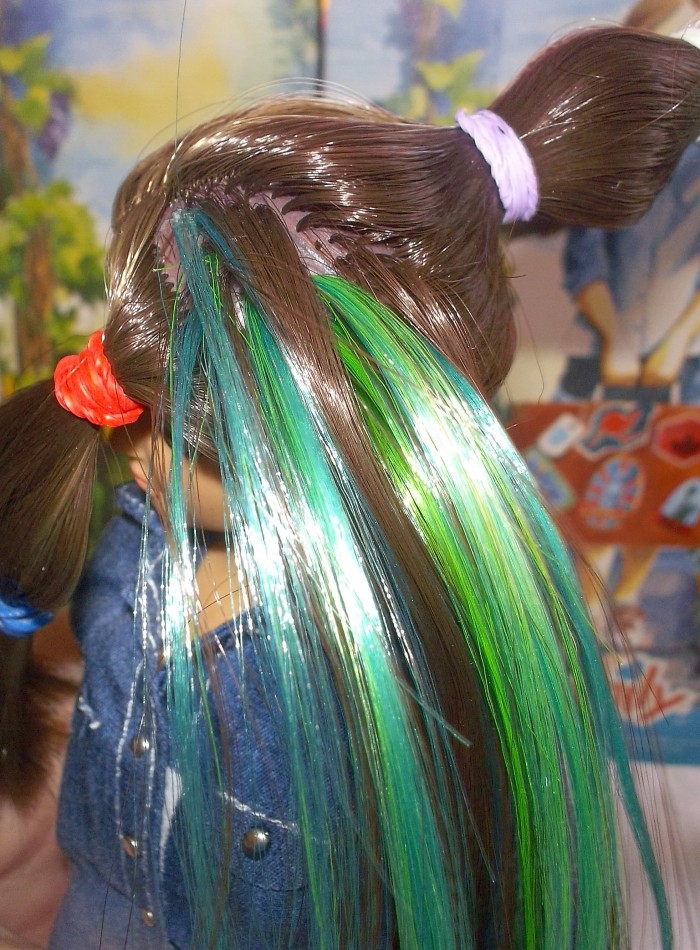
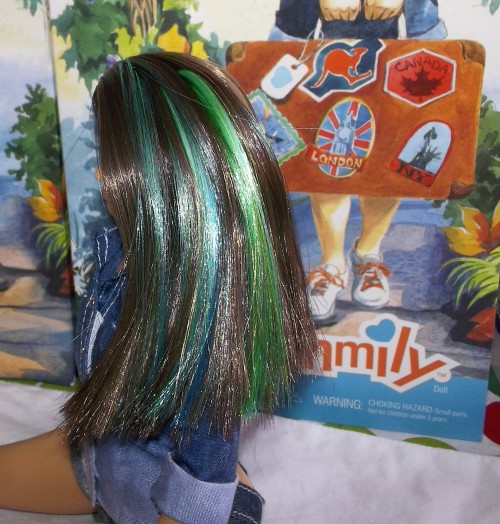
Following the directions from your re-rooting tool, begin inserting the colored hair into Lammily’s head, using the holes from the hair plugs your cut off. I find using a slight angle when inserting, rather than just going at a right angle, makes the hair lay nicer on the head. (see photo) Fill in the empty spaces with your colors. When done, lay the doll aside, and breathe. You did it! Now clean up all the loose hair left behind from the thinning and the re-root. Trust me, have a clean work space again, this prevents the loose hair from getting all over you and Lammily. Now, Undo the secured hair, and finger style it into place. Wow, look how nice that is!

Colored hair in place
trimmed even
light gel applied
Using a brush made for doll hair, gently brush the hair into place. A few loose or stray stands may fall off, and that is ok. To ‘train’ the new hair, I use ordinary hair gel on Lammily, a little dab goes a long way. If you are going to further style the hair, now is the time. I chose to trim the hair to a more uniform length. Cut and style in small sections, do not try and cut it all off at once. Been there, done that, epic fail. Think like a hair stylist and work in sections, in layers. Even just trimming her hair as I did, was done in layers and in small sections.
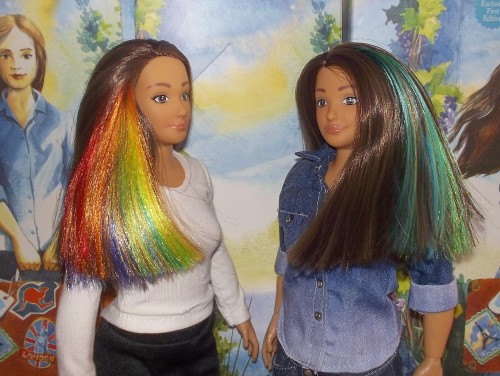
Ta Da! You have added a Color Splash to your Lammily! Enjoy her new look! Take her photo, share her new look and celebrate the diversity of your Lammily.
My resources:
Article by Em Carroll Hair Thinning Tutorial By Em LammilyLove.pdf found in the files section on Lammily Enthusiasts the official Lammily Fan Cub. (Facebook)
www.Dolyhair.com Site tutorial on rerooting doll hair, and nylon hair in assorted colors, I purchased the hair for My Little Pony as it was a smaller package, longer in length and an affordable price. The color assortment is astounding in this hair category.
My Re-root tool was purchased on eBay from: debi255, a Pro Hair Rooting Tool. A similar tool can be purchased from Dollmore (Korea) also on eBay.
My Etsy store:
I have made up some colored hair assortments that will yield 2 to 3 hair plugs each color. They are available in my Etsy Shop here: https://www.etsy.com/shop/LammyBabsandFriends?ref=hdr_shop_menu
Hi everyone,
My daughter’s Lammily hair became all fuzzy and we can’t brush it anymore. Do you have any advise on how to fix that?
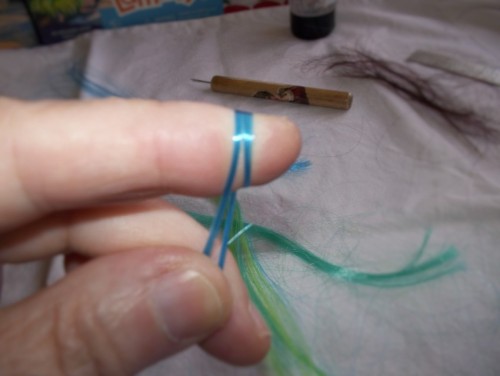
Lisa, the tension of the head material holds the hair in place. You pose a great question. One that is answered in many hair re-rooting tutorials. That is another reason to use small hair plugs. I didn’t go into detail on the actual use of the tool, because there are so many tutorials out there. But when using one like mine, you wrap the hair around your finger and cross it, so that when the forked needle picks it up and you tug the hair down on the needle, it forms a sort of bump/knot that acts as an anchor inside the head. I have brushed my Lammilys head with regular force/tension and have no further fall out since the addition of the colored hair. Thanks for asking.
Curious how you are securing the hair inside her head so that it won’t come back out, since you’re not taking her head off? Or are you just being careful when you brush it?